About Collections
-
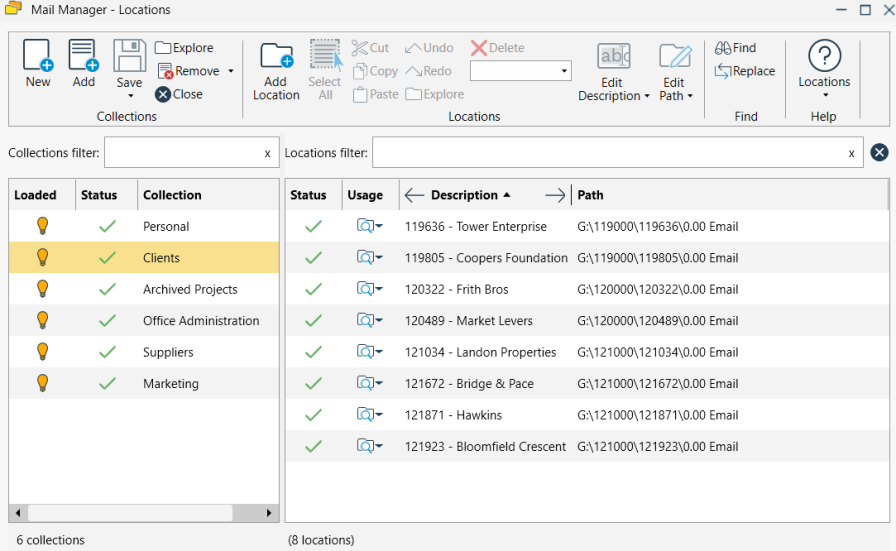
A collection is like an address book for locations that you need to file to i.e. it contains a list of folders with friendly names.
-
You can organise your folders into different collections, for example, one for your Clients another for your Office Administration etc.
-
An important aspect of collections is that they can be shared with your colleagues and any changes will be kept in sync for everyone.
-
From a user aspect a collection can be unloaded, so that you won't see the locations when filing or searching. See how to Load/Unload a collection below.
Collections can be created manually or by discovery.
-
Suited for filing locations that once setup, rarely need changing.
-
Suited for when a collection is for personal use or used by a small number of users (e.g. for company finance)
-
Navigate to Tools > Locations from the Mail Manager toolbar in the Outlook ribbon
-
The Locations tool will appear
-
Select the "New" button
-
The New Collection window will appear
-
Select the type of folder where the collection will be created
-
Use the Browse button to select the required folder or paste in the location path
-
Enter a suitable filename for the collection
-
Select "OK"
-
The new collection will be added to the list of collections in the Locations tool
-
Navigate to Tools > Locations from the Mail Manager toolbar in the Outlook ribbon
-
The Locations tool will appear
-
Select the "Add" button
-
Select the type of folder where the collection will be created
-
Use the Browse button to choose the required .mmcollection
-
Select "OK"
-
The new collection will be added to the list of collections in the Locations tool
-
Discovered collections are suited where the filing location is at the same level in the folder hierarchy for all your client or project folders and new ones are created on a frequent basis.
-
Whenever a new client or project folder is created and if the user has sufficient access, it will be automatically discovered and available to file to and search.
-
When setup and enabled, the client device discovers filing locations in a specific hierarchy.
-
Only locations that users have access to will be discovered.
-
For auto discovery to work it needs to know the following:
-
Where to start
-
The folder to discover
-
What to call each filing location and the name of a collection it should be associated with
-
It also needs to understand the hierarchy of system being discovered e.g. SharePoint, Network Folders, Procore etc.
-
-
Discovery is enabled via the User Preferences
-
Due to the limitless ways folder hierarchies can be setup, it may not always be possible to implement auto discovery.
-
Specialist configuration is required to setup auto discovered filing locations.
-
Contact: support.mailmanager@ideagen.com for more information.
-
When enabled, locations are discovered soon after starting Outlook and then once an hour.
-
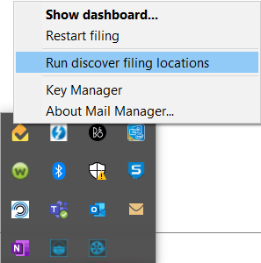
To run the auto discovery manually, Navigate to the Windows Notification Tray and select the Mail Manager icon
 or from the Windows Notification Tray select the Mail Manager icon and choose "Run discover filing locations"
Note: Automatic Discovery of locations and collections is only available for subscription licence users.
Discovery of locations occurs when the MailManager.AutoDiscoveryLocations.exe is running (see Windows Task Manager). When the process ends the locations will be available for filing.
-
Navigate to Tools > Locations from the Mail Manager toolbar in the Outlook ribbon
-
The Locations tool will appear
-
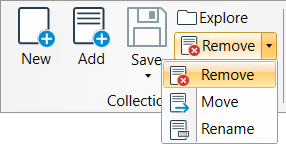
Using the remove option removes the selected collection from your list of collections, it won't affect other users who are using the same collection.
-
Remove a collection by either:
-
Select a collection, right-click and choose "Remove"
-
Choose the menu shown below and select "Remove"
-
The selected collection will be removed from your list of collections.
-
-
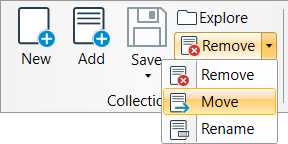
Using the move option you can move the selected collection from one folder to another.
-
This can be useful when you have created a collection on your local drive and want to make it available to others by moving it to a network folder.
-
Move a collection by either:
-
Select a collection, right-click and choose "Move"
-
Choose the menu shown below and select "Move"
-
The Browse for Folder window will appear
-
Browse to the required folder and then select "OK"
-
-
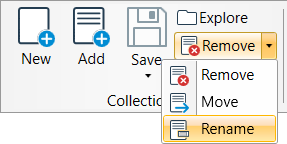
Rename a collection by either:
-
Select a collection, right-click and choose "Rename"
-
Choose the menu shown below and select "Rename"
-
The collections rename window will appear.
-
Enter the required name and select "OK"
Note: anyone else that used the renamed collection will need to remove and re-add the collection. This can be done centrally via the shared configuration folder and the Collections.txt file.
-
An important feature of Mail Manager is that collections and their associated filing locations can be shared with colleagues. This brings the following benefits:
-
Reduces duplication of effort; Only one user needs to create a filing location and it will automatically be available to their colleagues
-
Consistency of location folders e.g. the similar folders are used for each client email or project email folders
-
Common naming of descriptions providing familiarity for all users
-
Straight away new users are more productive by not having to learn how to create locations
-
Higher rate of adoption, because it makes filing so easy
More information:
-
A collection file (.mmcollection) and its associated filing locations can be shared by saving the collection file to a shared folder.
-
Anyone adding an existing collection to their Mail Manager will see the same list of filing locations as their colleagues.
-
Changes that are saved to a shared collection will automatically synchronize for all users within approximately one minute.
